Monday, November 4, 2013

Hello from a new home!

As you may have guessed from my absence on my blog, our family has gone through a couple changes. Both the hubs and I are back in school, this time hoping to attach a "Dr." to our names when it's all said and done. We also ended up moving to a different state and even a different part of the country. Unfortunately, being back in school means I have less time (ok, no time) to blog. I hope to do a couple more blogs over the holidays, so for now, hello from our new home!


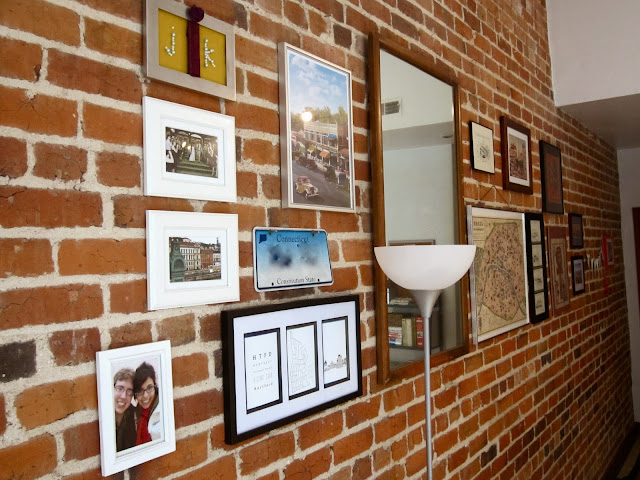
 we live in a historical industrial building that was converted into loft-like apartments. 


our wall of art, including our old license plate from CT.


thanks for stopping by and stay tuned for upcoming posts! 
(you know me, I've already rearranged the furniture) ;)


Wednesday, March 13, 2013

Make Your Own: Bread [No-knead, Artisan, Cranberry and Blood Orange Loaf)


Now that you know how to make your own butter, we've got to have something to slather it on. Today I want to share with you an easy and customizable artisan loaf. You can make it plain, or as I'm doing here today, customizing it. This is a great and tasty bread and takes hardly any effort. The one thing it does require is time. Letting it sit out on the countertop for 12-18 hours is essential to get that sourdough flavor. Let's dive right in.


Cranberry and Orange Zest Artisan Loaf 
3 cups all-purpose flour (unbleached is good)
1/2 tsp. yeast
1 1/2 tsp. salt
3/4 cup dried cranberries
zest from 1 orange
1 1/2 cups water

1. In a large bowl mix together everything except the water. Add  the water and mix that dough until it's shaggy. Cover with plastic wrap and rest on the counter top for 12-18 hours. (This is absolutely necessary)

2. When you are ready to bake the bread, preheat your oven to 450F and put your dutch oven, lid included,  (or stainless steel soup pot, or really anything that's ovenproof) in the oven while it's preheating. Turn your dough onto a heavily floured surface and shape into a ball. Cover with plastic.

3. After 30 min. take the hot pot out of the oven and dump in your ball of dough. Bake for 30 min. with the lid on, then an additional 15 min. Dump the loaf onto a rack and cool. 


Cranberries and blood orange zest goes in with the dry ingredients.

After 18 hours, your dough will have risen. 


Enjoy your homemade goodness!

Friday, March 8, 2013

How To Make Your Own: Butter

Welcome to the first installment of the "Make Your Own" series!  I've been working on some great household staples to share with you and it just seemed right to have butter be first. Right off the bat, let's  be clear that butter is probably the easiest thing you can make - which is awesome, because most people will be completely impressed when you say you make your own butter. You only need 1 thing: heavy cream. A lot of organic websites will say it will only work with organic cream, however this is not the case. Even with ULTRA pasteurized cream it should work just fine. All of this leads to the question "why would I want to make my own butter?" Let me help with that.

1. Why would you NOT want to know how to make butter? I'm a strong believer that kids should know where their food comes from and how to make it. I don't want my kids to walk through a grocery store and see bread, yogurt, cheese, butter, etc. and not know what each of those things is made of. It's all about developing skills and integrating healthy living into our existence. I'm a big believer in the self-sufficient life. Even while living in a city.

2. Homemade butter is sweet, creamy, and amazingly spreadable. It may not sound like much but I hate wrestling with hard butter to spread on my toast and ending up with partially melted, partial chunks on my bread.

3. Homemade butter is extremely customizable. You can mix in rosemary and sea salt and you've got yourself some gourmet awesomeness. Or think about vanilla-bourbon butter to spread on your waffles or french toast. Or how about some pumpkin spice butter on a cinnamon bagel with a chai latte? Check out the links at the end of the post to see some recipes for customized flavors.


Homemade Butter (sweet cream, plain)

Heavy Cream

Cheesecloth
Electric mixer with the whip attachment  (if you don't have an electric mixer you can put the cream in a bottle and furiously shake it to get the same results. I'll warn you, your arm will get tired.)

{You can make this recipe with as little as 1/4 cup of cream, you'll just get a tiny pat of butter. One quart of cream = 1 pound of butter. I usually just use about 3/4 cup of cream at a time. You'll get butter and buttermilk from this recipe.}

1. Pour the cream into the bowl of your Kitchen Aid and secure the whip attachment. Secure the bowl down and turn on to medium speed.
2. 15-20 min later, you will have butter and buttermilk.
3. Pour out the white liquid (buttermilk) into a jar and store in fridge for use in coffee, pancakes, whatever.
4. Put the butter curds into a cheese cloth and wring out as much of the milk as you can. Transfer the blob of butter to a bowl and pour 1 cup of cold water over the butter. Fold and press the butter in the water to rid it of impurities. Repeat process until water runs clear. This process is called "washing." The secret to a good butter is to get all the water and milk out of it.
5. Store in fresh butter keeper or small cup overturned in a bowl of cold water. Be warned that if you refrigerate the butter it will not get soft again. Store it on the counter top and change water every other day.


This is what you'll see in your Kitchen Aid when your butter is ready to be taken out.


Put the butter curds in a cheesecloth and squeeze the buttermilk out. (by the way, the buttermilk that comes out of this is super sweet and delicious. great in hot drinks!)


My buttermilk

Once the liquid is all squeezed out, take your butter out and transfer it to a bowl for the washing. Washing will help keep your butter fresh and sweet for longer as well as rid it of impurities.


Wash the butter by pouring cold water over it and turning, pressing and folding the butter in it.


My fresh butter! It's being stored in a glass votive candle holder. Classy, I know, but I'm waiting to find a nice fresh butter keeper to invest in.


This is how you store the butter so it doesn't spoil. Pack the butter in a cup or glass and smooth over the top. Put cold water in a bowl and turn your butter upside down. The butter doesn't fall out and the water doesn't get absorbed, don't worry! The fat in the butter repels the water.


I really hope you join me in making your own butter! I 'd love to hear about it if you do! 


Wednesday, February 27, 2013

Braised Beef Short Ribs ( a recipe too good not to share)

This year for Valentine's Day something awesome happened- both me and my husband had a totally free day. Since we're musicians, our schedules are a bit unusual and wonked out anyway, but we rarely get a day with literally no scheduled events.  We usually go out to one of our favorite, more fancy restaurants for anniversaries and holidays like Val's day, but since we had the whole day to ourselves, we decided to make something that we probably wouldn't order from a fancy restaurant since it would cost a fortune. So deciding to do the work ourselves, we went grocery shopping and purchased all the ingredients. OK, so enough back story. Here's about the recipe.

The recipe we used is from America's Test Kitchen, which if you don't know what they do or how they come up with their recipes, you need to check them out. End of story, since I could talk all day about how thorough and excellent they are. Continuing on. For this recipe it's of utmost importance that you buy the right kind of meat. You want your short ribs boneless (if you can't find boneless, just de-bone and de-fat them yourself) and at least 4 inches long and about 1 inch thick. This ensures that the meat won't dry out during the long and slow cooking time. You'll start the meat out on the stove top to braise it and then finish it in the oven. You can serve this with egg noodles or boiled potatoes to sop up all the saucy goodness. Apart from the beef bourguignon I had in Paris this past summer, this is the best beef dish I have  ever had. It's succulent and moist with complex flavor. Also, you won't want to eat your carrots any other way once you've had this. If you want to treat your spouse to a special dinner, you've found your recipe!


Braised Beef Short Ribs
Serves 6, or 4 very hungry adults
3 1/2 pounds boneless short ribs with fat trimmed off and cut into 2 inch pieces (we actually used slightly less meat since it's super expensive)
Table salt and pepper
2 TB veg. oil
2 large onions, thinly sliced into strips (about 4 cups)
1 TB tomato paste
6 medium garlic cloves
2 cups red wine, either Cabernet Sauvignon or Cotes du Rhone (we used Cabernet and it was amazing)
1 cup beef broth
4 large carrots, peeled and cut into 2 inch pieces
4 sprigs of FRESH thyme (please don't substitute dried here!)
1 bay leaf
1/4 cup cold water
1/2 tsp. powdered unflavored gelatin

1. Put your oven rack in the lower middle position and preheat to 300F. Dry the beef (pat with paper towels) and season with  salt and pepper on both sides. Heat 1 TB of the oil in a Dutch oven over medium-high heat, until the oil is smoking just a bit. Add half of the beef to the pot and let it brown on both sides, about 3-5 minutes per side. (try not to stir or move it as it is browning- it won't brown as well) Take the beef out and set in a medium bowl. Repeat the process with the rest of the beef. Take out the pieces and set them in a bowl with the first half of browned beef.

2. Reducing the heat to medium, add all the onions and cook until they are soft and just turning brown, about 10 minutes. Add the tomato paste and cook while stirring constantly, until it's a bit brow, about 2 minutes. Add the garlic and cook about 30 seconds. Increase the flame to medium high and add the wine. Simmer it while scraping the sides and bottom of the Dutch oven, to get all the flavor and loosen those yummy browned bits. Simmer until the liquid is halved, about 8 minutes.  Add the broth, carrots, thyme, bay leaf, and beef, including all the juice that's in the bottom of the bowl that you had the beef in. Cover the pot and bring to a simmer. Then transfer the pot to the oven and cook, stirring once about an hour through. Cook in the oven about 2- 2 1/2 hours, or until a fork slips in and out easily of the meat.

3. Put the water in a small bowl and sprinkle gelatin on top; let it sit for 5 minutes. Using tongs transfer the meat and veggies (onions included) onto a serving platter. Drain the liquid through a fat separator and discard the solids. Put the liquid back into the Dutch oven and cook over medium heat for 5 minutes. Remove from heat and stir in the gelatin mixture. Season with salt and pepper. Pour over the meat and veggies. 


So there you have it! I hope you try this recipe. Be warned that it can be a little on the expensive side, about $20 for the meat and $10 for the wine. But if you were to order this in a restaurant it would cost much, much more.


Tuesday, January 29, 2013

since last time...

I don't really have a whole lot to say today except that I wish I was blogging more. A lack of inspiration combined with being really busy ( the #1 blogger excuse, courtesy of lazy.com/blogger)  has accounted for my invisibleness on this blog. However, I am super excited to start a new series called "Make Your Own:______." Obviously the blank will be filled in with exciting things, mostly food.

Over Christmas and New Year's I was sick for a couple weeks which allowed me to read a lot. I read the book "Animal, Vegetable, Miracle" by Barbara Kingslover. If you haven't read it, I highly recommend it. It's fast, interesting, and very yummy (as much as a book can be). Besides being all of that, it inspired me to start making some of the things that we buy at the store without thinking if we could make them or not. So here's to a delicious (hopefully) expedition of making and not buying bread, butter, cheese, yogurt, jams, and whatever else I can without going broke or ruining my taste buds.

And just because no blog post should be without a picture, here's some of what we've been eating and making since my last post.


taco night. yuuuuhm! steak and chicken, cilantro-lime rice, sauteed red onions and peppers, guacamole, salsa, sour cream, and siracha (for an extra kick of heat)  


Black Pepper and Nutmeg Popovers from Bon Appetit's November Magazine.


This is such a yummy, fast lunch. Homemade bun sliced in 1/2 with a fried egg and topped with Trader Joe's chicken andouille sausage. Their sausages, while expensive, are some of my favorites ever. They don't have any nitrates, are already precooked and have such a delicious flavor. I highly recommend them!

What yummy food have you cooked recently?