Showing posts with label Recipies. Show all posts

Wednesday, June 18, 2014

Elvis Cupcakes (banana, peanut butter and chocolate)

You can hate me right now, but I'm not a big sweets person. Yes, that right. I'd rather have a briney pickle or olive than sweet cookie or slice of cake. I made these cupcakes to 1) fulfill a need to bring something to a bake sale and 2) use up ingredients that I had at home, which in this case were bananas and peanut butter.


Like I said,  I'm not a sweets person, but these cupcakes were delicious. Especially if you like banana, peanut butter, or chocolate. Personally, I'm not a huge fan of any of those things, but these cupcakes are fantastically delicious. They were the first item to be sold out of at the bake sale. They not only taste great, but also look great. (and you don't have to be a pastry chef to make them look like a million bucks, which is always a big plus in my book) I have this thing about making things look as good as they taste and this recipe will not leave you disappointed.


The cake is a banana cake, the glaze is peanut butter, and the garnish is shaved chocolate. The combination of the the three flavors is know as "Elvis." (You can make Elvis cookies, pancakes, smoothies, etc.) Recently I've been going the 'glaze' route with cupcakes because it's much easier to make it look professional. Not to mention, you don't have to use butter (which is an expensive ingredient), and you don't need a pastry bag or tips. You do however, need a cooling rack, which gets very sticky and messy, which unfortunately is one of my husband's least favorite kitchen item to wash (in case you were wondering, the cheese grater and garlic press are also among his top most annoying things to wash).

These aren't that much of a hassle to make, and you can rarely find them in acceptable bakeries, so if you're looking for something special, these cupcakes fit the bill.
---------------------------------------------------------------------------------------------------------
ELVIS CUPCAKES
Cupcake Batter:                                                                                            
1 ripe banana (frozen or fresh is fine, just mash it up)
1 tsp. lemon juice
2 eggs
1 cup all purpose flour plus 2 TB cornstarch
1/2 cup of sugar
2 tsp. baking powder
1/4 tsp. kosher salt
1/3 cup veg. oil
 DIRECTIONS: Preheat oven to 350F and line a 12 muffin pan with liners. Mash together the banana and lemon juice until smooth, then whisk in eggs. In the bowl of your electric mixer, use a fork to whisk together your flour, cornstarch, sugar, baking powder, and salt. Put on the paddle attachment and beat in the oil until it's well incorporated. Add your banana/lemon juice/egg mixture and mix until just combined. Fill the cupcake liners 2/3 full. Bake 15-20, until a toothpick comes out clean. Make the glaze while they cook. (directions below) Transfer to a wire rack and remove from pan immediately so they don't get overcooked.
Glaze: Whisk together 1/2 cup of creamy peanut butter and 2 TBS of milk (or you can use water/almond or rice milk/cream, whatever). Add 1/2 cup of confectioner's sugar and beat until smooth. Add more sugar if you want a sweeter glaze. The glaze should drizzle off your whisk when you hold it above your bowl. (adjust consistency with more liquid/sugar).
Topping: Use a microplane or the little blades on a grater to shave some dark chocolate onto a plate. I used Ghirardelli's extra dark, and only used like 1 oz for all 12 cupcakes. You may have to freeze the chocolate and the shavings so they don't get all melty (especially since it's summer! the heat of your hands can make things get gloopy)

Assemble:  While the cupcakes are still hot, push them close together on your cooling rack. This makes sure you waste a minimum amount of glaze. You may want to put a cookie sheet or parchment paper under your cooling rack to minimize the mess.Take your whisk and swirl it in the glaze. With a  Bob Ross like motion,  float your whisk above the cupcakes, left to right and glaze those babies.  Replenish your whisk as needed. When you are done glazing , get your chocolate shavings from the freezer and sprinkle them on top. 


Wednesday, April 2, 2014

Make Your Own: Chinese Dumplings

There's this really good 1/2 cookbook, 1/2 story book I like to read. It's called Make the Bread, Buy the Butter by Jennifer Reese. It's the hilarious story of her culinary experiments. She has tried making pretty much everything from scratch including cheeses, breads, prosciutto, and a host of other foods. Each recipe comes with a cost analysis of ingredients and how much it would cost if you bought the finished product in the store. Besides being a great resource, it's pretty entertaining....but that's all I'll say about the book since this is not a sponsored post and I really just want to tell you how to make delicious dumplings. Or potstickers. Or whatever you'd like to call them.


These potstickers (despite the long list of ingredients) are way more yummy than the pre-made kind you buy in the frozen foods aisle and even more delicious than the ones you order from your favorite Kung-Fu-Wok-China-House-Lucky-Express-Panda-Chang restaurant. They take a little bit of time to put together, but it's not a complicated process and it is SOOOOO much cheaper than buying them. I've made them twice now, and I'll tell you, it's easy to eat 10 or more. We like to make a dipping sauce for them, mixing soy sauce and sriracha, but you could easily do something different depending on your personal tastes. I usually make a trip to our local asian market and pick up the ingredients for less than $10, and this recipe makes 60-80 potstickers. That sounds like a lot, but trust me, you'll want that many.

Here's the recipe, modified from Make the Bread, Buy the Butter.

Ingredients:
1 pound fatty boneless pork shoulder, ground
3/4 pound napa cabbage, finely shredded
1 tsp. kosher salt
1/4 cup minced scallion
1/4 cup minced cilantro
1 tsp. minced ginger
2 cloves of garlic, minced
2 tBSsoy sauce
1 tBs sesame oil
1/4 tsp. of red pepper flakes
1/4-1/2 tsp. sriracha sauce (depending on how spicy you want them)

About 80 round dumpling wrappers (usually in the frozen section)
All-purpose flour (for dusting)
Vegetable oil/Olive oil (for frying)

---------------------------------------------------------------------
Directions:
In a large bowl combine all the filling ingredients and mix well. Fry up a tablespoon of the mixture in a small frying pan and taste it. Adjust seasoning to your liking.

Set up a dumpling wrapping station with the wrappers, filling, small bowl of water and a cookie sheet lined with parchment or dusted with flour.

Into the middle of each wrapper put a generous teaspoon (I use a small spoon, not the actually measuring spoon). With your fingers wet or brush, wet a semi-circle (1/2) of the edge of the dumpling wrapper. Fold in  half and pinch to close. Pinch and pleat the wrapper and place on the cookie sheet. Repeat until you have no more wrappers.

Bring a large pot of water to boil and add 2 teaspoons of oil.  Drop in 15 potstickers and cook for 5-7 minutes. Scoop out the potstickers, drain briefly, and place on a clean cookie sheet. Repeat with remaining
dumplings.

Heat one tablespoon of oil in a large skillet and spray with non-stick spray (or do it in a non-stick skillet). When the oil is shimmering/sizzling, add 10-12 dumplings. Cook on one side until the skin begins to brown and "thicken." (about 2/3 min.) Cook on the other side. Repeat with remaining dumplings. Serve immediately.

----------------------------------------------------------------------------------------------------

FYI: don't let my interchange of the words potstickers and dumplings confuse you. I'm talking about the same thing.  I'm not sure if you could make these vegetarian (with tofu or something) but I would love to hear if you experiment with that. We like our potstickers fairly spicy so I put a few shakes of red pepper flakes and a small squeeze of sriracha (probably about 1/4 tsp). However, they are not that spicy, so we make a sauce out of sriracha and soy sauce. You could probably put more sriracha in the dumpling filling and then have a sauce with soy and sesame oil if you want....just an idea. Also, these freeze well. I make a big batch the freeze them in containers with 7 dumplings. Into the microwave they go for 90 seconds and they're ready to eat.


Here's the mixture. You want everything pretty small. (I should have shredded the harder, white part of the cabbage a little smaller). I use this small soup spoon/teaspoon to measure the filling into the dumplings. If you stuff them too much they'll break or explode when you boil them. 


Here are about half of the dumplings, before they were boiled. It's important to add some oil to your pot of boiling water so that these babies don't stick to the bottom of the pot. After you put 15ish in the boiling water, give them a stir to make sure they're not sticking to the pot or each other. 


Happy Dumpling Making!


Tuesday, March 11, 2014

Easy Energy Bites


Some days I just don't have enough energy. Sometimes I am looking for a snack to take with me when I go out on errands so I don't buy an entire Whole Foods store. Or a Chick-Fil-A sandwich. In the past I've tried making granola bars, other times shelling out cash for pricey Cliff or Luna bars. To be honest, none of those bars really cut it for me on the taste test. Yeah, they're ok, but I can't rave about the oatmeal-chocolate-chip or carrot-cake flavors that seem to be so popular. My solution is energy bites- I pack a couple in my lunch bag or purse when I think I might need a quick burst of energy or snack to tide me over until the next meal.

These energy bites are fast, simple and relatively nutritious. They are easy to customize and can be made in raw and vegan versions. So grab your measuring cups and a teaspoon and give these a try!


Easy Energy Bites

1 cup uncooked oats (I like to use quick oats since they're smaller pieces than old fashioned. Do not use steel cut for these.)
1/2 cup peanut butter
1/2 cup flax meal
1/3 cup honey
1/4 cup chocolate chips
1 tsp. vanilla extract

Combine all the ingredients in a bowl. Shape into balls and chill 30 min. Ideally, store in the refrigerator or freezer. (I often put a couple in a sandwich bag in my purse for a couple days and they're fine) Makes 17-19 energy bites/balls.

Customize: Add a cup of coconut flakes,  1/4 cup diced crasins/raisins, sub the choco chips with butterscotch chips. Sub in almond butter or nutella (cut back on the sweetener if you use nutella).


*I've made this before using granulated sugar when I'm out of honey. They still taste pretty good and stay together in a ball. The honey is a better binder for sure, though.

*You can see from the picture above, I go pretty scant on the honey. I don't like these to be too sweet. Chocolate chips on the other hand, get a heaping 1/4 cup. Seems logical, right?

*Flax meal is available at health food stores, and occasionally I can find it at Big Lots for super cheap.

Just dump everything into the bowl and mix.


This is what your mix should look like when you are ready to shape them into balls.


You can make the bites/balls as big or little as you want. I usually make mine a little bit larger than a tablespoon. 

If you make these, I'd love to know- especially if you're tried a variation of this! Happy cooking!

Sunday, January 5, 2014

Quick & Easy Sour Milk Biscuits


There's a running joke around here that these are "Sour Milk Biscuits with Salt." The second time I made these, I forgot to put in the salt. After assuring my husband I had followed the recipe exactly, I was puzzled why they didn't taste as good as the first time. He quietly asked me if I had put any salt in them and I insisted the recipe didn't call for any. Well, I swallowed my words when I checked the recipe. Now, whenever I say I'm going to make some biscuits my husband asks "oh, are you going to make Sour Milk Biscuits with Salt?" It's just a gentle reminder. Don't forget the salt.

At our house we always seem to have some sour milk on hand, so this recipe is pretty perfect for our family. If you don't have sour milk don't worry, you can still make these biscuits. Just set out a scant 1 cup of milk and add a tablespoon of vinegar to it. The milk will curdle in about five minutes and voila, sour milk. These will work just as well with lactose-free milk or half and half. I haven't tried soy, rice, or almond milk, but my guess is that as long as you add some lemon juice to react with the baking soda, it just might work.

Sour milk biscuits with a side of persimmon. 


We like these biscuits because they are fluffy and have nice buttery layers to them. They are a perfect substitute for the Pillsbury Biscuits from a can, but better since they don't have chemicals or unnecessary ingredients. They also come together pretty quickly- I start out by preheating my oven, and by the time it gets to 450F, my biscuits are ready to go in the oven.

You can have these versatile biscuits for breakfast with jam and butter, or with a sausage patty and egg inside, or for dinner with chicken pot pie filling. They also freeze well- I've kept them for about 2 months in my freezer and reheated them in the micro for less than a minute when we want some.


Quick and Easy Sour Milk Biscuits

2 cups all purpose flour
1 tsp. salt
4 tsp. baking powder (seems like a lot, but you want them to be fluffy!)
4 TBS cold butter or lard
1 cup sour milk

Preheat oven to 450F and line a cookie sheet with a Silpat or parchment paper. Mix dry ingredients together. Put fat in flour and mix together until pea-sized lumps occur (crumble with fingers).

Make a well, pour in milk, and mix until it becomes a sticky dough. Flour work surface, rolling pin, and hands. Drop dough on surface. Work some flour into the dough by gently kneading.

Roll out and fold dough in half. Repeat two more times, turning the dough 90 degrees each time. Roll out one final time and cut into circles with a cookie cutter (or, like I do, make squares but cutting with a pastry scraper). Bake 8-10 min. until lightly brown.


Wednesday, March 13, 2013

Make Your Own: Bread [No-knead, Artisan, Cranberry and Blood Orange Loaf)


Now that you know how to make your own butter, we've got to have something to slather it on. Today I want to share with you an easy and customizable artisan loaf. You can make it plain, or as I'm doing here today, customizing it. This is a great and tasty bread and takes hardly any effort. The one thing it does require is time. Letting it sit out on the countertop for 12-18 hours is essential to get that sourdough flavor. Let's dive right in.


Cranberry and Orange Zest Artisan Loaf 
3 cups all-purpose flour (unbleached is good)
1/2 tsp. yeast
1 1/2 tsp. salt
3/4 cup dried cranberries
zest from 1 orange
1 1/2 cups water

1. In a large bowl mix together everything except the water. Add  the water and mix that dough until it's shaggy. Cover with plastic wrap and rest on the counter top for 12-18 hours. (This is absolutely necessary)

2. When you are ready to bake the bread, preheat your oven to 450F and put your dutch oven, lid included,  (or stainless steel soup pot, or really anything that's ovenproof) in the oven while it's preheating. Turn your dough onto a heavily floured surface and shape into a ball. Cover with plastic.

3. After 30 min. take the hot pot out of the oven and dump in your ball of dough. Bake for 30 min. with the lid on, then an additional 15 min. Dump the loaf onto a rack and cool. 


Cranberries and blood orange zest goes in with the dry ingredients.

After 18 hours, your dough will have risen. 


Enjoy your homemade goodness!

Friday, March 8, 2013

How To Make Your Own: Butter

Welcome to the first installment of the "Make Your Own" series!  I've been working on some great household staples to share with you and it just seemed right to have butter be first. Right off the bat, let's  be clear that butter is probably the easiest thing you can make - which is awesome, because most people will be completely impressed when you say you make your own butter. You only need 1 thing: heavy cream. A lot of organic websites will say it will only work with organic cream, however this is not the case. Even with ULTRA pasteurized cream it should work just fine. All of this leads to the question "why would I want to make my own butter?" Let me help with that.

1. Why would you NOT want to know how to make butter? I'm a strong believer that kids should know where their food comes from and how to make it. I don't want my kids to walk through a grocery store and see bread, yogurt, cheese, butter, etc. and not know what each of those things is made of. It's all about developing skills and integrating healthy living into our existence. I'm a big believer in the self-sufficient life. Even while living in a city.

2. Homemade butter is sweet, creamy, and amazingly spreadable. It may not sound like much but I hate wrestling with hard butter to spread on my toast and ending up with partially melted, partial chunks on my bread.

3. Homemade butter is extremely customizable. You can mix in rosemary and sea salt and you've got yourself some gourmet awesomeness. Or think about vanilla-bourbon butter to spread on your waffles or french toast. Or how about some pumpkin spice butter on a cinnamon bagel with a chai latte? Check out the links at the end of the post to see some recipes for customized flavors.


Homemade Butter (sweet cream, plain)

Heavy Cream

Cheesecloth
Electric mixer with the whip attachment  (if you don't have an electric mixer you can put the cream in a bottle and furiously shake it to get the same results. I'll warn you, your arm will get tired.)

{You can make this recipe with as little as 1/4 cup of cream, you'll just get a tiny pat of butter. One quart of cream = 1 pound of butter. I usually just use about 3/4 cup of cream at a time. You'll get butter and buttermilk from this recipe.}

1. Pour the cream into the bowl of your Kitchen Aid and secure the whip attachment. Secure the bowl down and turn on to medium speed.
2. 15-20 min later, you will have butter and buttermilk.
3. Pour out the white liquid (buttermilk) into a jar and store in fridge for use in coffee, pancakes, whatever.
4. Put the butter curds into a cheese cloth and wring out as much of the milk as you can. Transfer the blob of butter to a bowl and pour 1 cup of cold water over the butter. Fold and press the butter in the water to rid it of impurities. Repeat process until water runs clear. This process is called "washing." The secret to a good butter is to get all the water and milk out of it.
5. Store in fresh butter keeper or small cup overturned in a bowl of cold water. Be warned that if you refrigerate the butter it will not get soft again. Store it on the counter top and change water every other day.


This is what you'll see in your Kitchen Aid when your butter is ready to be taken out.


Put the butter curds in a cheesecloth and squeeze the buttermilk out. (by the way, the buttermilk that comes out of this is super sweet and delicious. great in hot drinks!)


My buttermilk

Once the liquid is all squeezed out, take your butter out and transfer it to a bowl for the washing. Washing will help keep your butter fresh and sweet for longer as well as rid it of impurities.


Wash the butter by pouring cold water over it and turning, pressing and folding the butter in it.


My fresh butter! It's being stored in a glass votive candle holder. Classy, I know, but I'm waiting to find a nice fresh butter keeper to invest in.


This is how you store the butter so it doesn't spoil. Pack the butter in a cup or glass and smooth over the top. Put cold water in a bowl and turn your butter upside down. The butter doesn't fall out and the water doesn't get absorbed, don't worry! The fat in the butter repels the water.


I really hope you join me in making your own butter! I 'd love to hear about it if you do! 


Wednesday, February 27, 2013

Braised Beef Short Ribs ( a recipe too good not to share)

This year for Valentine's Day something awesome happened- both me and my husband had a totally free day. Since we're musicians, our schedules are a bit unusual and wonked out anyway, but we rarely get a day with literally no scheduled events.  We usually go out to one of our favorite, more fancy restaurants for anniversaries and holidays like Val's day, but since we had the whole day to ourselves, we decided to make something that we probably wouldn't order from a fancy restaurant since it would cost a fortune. So deciding to do the work ourselves, we went grocery shopping and purchased all the ingredients. OK, so enough back story. Here's about the recipe.

The recipe we used is from America's Test Kitchen, which if you don't know what they do or how they come up with their recipes, you need to check them out. End of story, since I could talk all day about how thorough and excellent they are. Continuing on. For this recipe it's of utmost importance that you buy the right kind of meat. You want your short ribs boneless (if you can't find boneless, just de-bone and de-fat them yourself) and at least 4 inches long and about 1 inch thick. This ensures that the meat won't dry out during the long and slow cooking time. You'll start the meat out on the stove top to braise it and then finish it in the oven. You can serve this with egg noodles or boiled potatoes to sop up all the saucy goodness. Apart from the beef bourguignon I had in Paris this past summer, this is the best beef dish I have  ever had. It's succulent and moist with complex flavor. Also, you won't want to eat your carrots any other way once you've had this. If you want to treat your spouse to a special dinner, you've found your recipe!


Braised Beef Short Ribs
Serves 6, or 4 very hungry adults
3 1/2 pounds boneless short ribs with fat trimmed off and cut into 2 inch pieces (we actually used slightly less meat since it's super expensive)
Table salt and pepper
2 TB veg. oil
2 large onions, thinly sliced into strips (about 4 cups)
1 TB tomato paste
6 medium garlic cloves
2 cups red wine, either Cabernet Sauvignon or Cotes du Rhone (we used Cabernet and it was amazing)
1 cup beef broth
4 large carrots, peeled and cut into 2 inch pieces
4 sprigs of FRESH thyme (please don't substitute dried here!)
1 bay leaf
1/4 cup cold water
1/2 tsp. powdered unflavored gelatin

1. Put your oven rack in the lower middle position and preheat to 300F. Dry the beef (pat with paper towels) and season with  salt and pepper on both sides. Heat 1 TB of the oil in a Dutch oven over medium-high heat, until the oil is smoking just a bit. Add half of the beef to the pot and let it brown on both sides, about 3-5 minutes per side. (try not to stir or move it as it is browning- it won't brown as well) Take the beef out and set in a medium bowl. Repeat the process with the rest of the beef. Take out the pieces and set them in a bowl with the first half of browned beef.

2. Reducing the heat to medium, add all the onions and cook until they are soft and just turning brown, about 10 minutes. Add the tomato paste and cook while stirring constantly, until it's a bit brow, about 2 minutes. Add the garlic and cook about 30 seconds. Increase the flame to medium high and add the wine. Simmer it while scraping the sides and bottom of the Dutch oven, to get all the flavor and loosen those yummy browned bits. Simmer until the liquid is halved, about 8 minutes.  Add the broth, carrots, thyme, bay leaf, and beef, including all the juice that's in the bottom of the bowl that you had the beef in. Cover the pot and bring to a simmer. Then transfer the pot to the oven and cook, stirring once about an hour through. Cook in the oven about 2- 2 1/2 hours, or until a fork slips in and out easily of the meat.

3. Put the water in a small bowl and sprinkle gelatin on top; let it sit for 5 minutes. Using tongs transfer the meat and veggies (onions included) onto a serving platter. Drain the liquid through a fat separator and discard the solids. Put the liquid back into the Dutch oven and cook over medium heat for 5 minutes. Remove from heat and stir in the gelatin mixture. Season with salt and pepper. Pour over the meat and veggies. 


So there you have it! I hope you try this recipe. Be warned that it can be a little on the expensive side, about $20 for the meat and $10 for the wine. But if you were to order this in a restaurant it would cost much, much more.


Wednesday, December 19, 2012

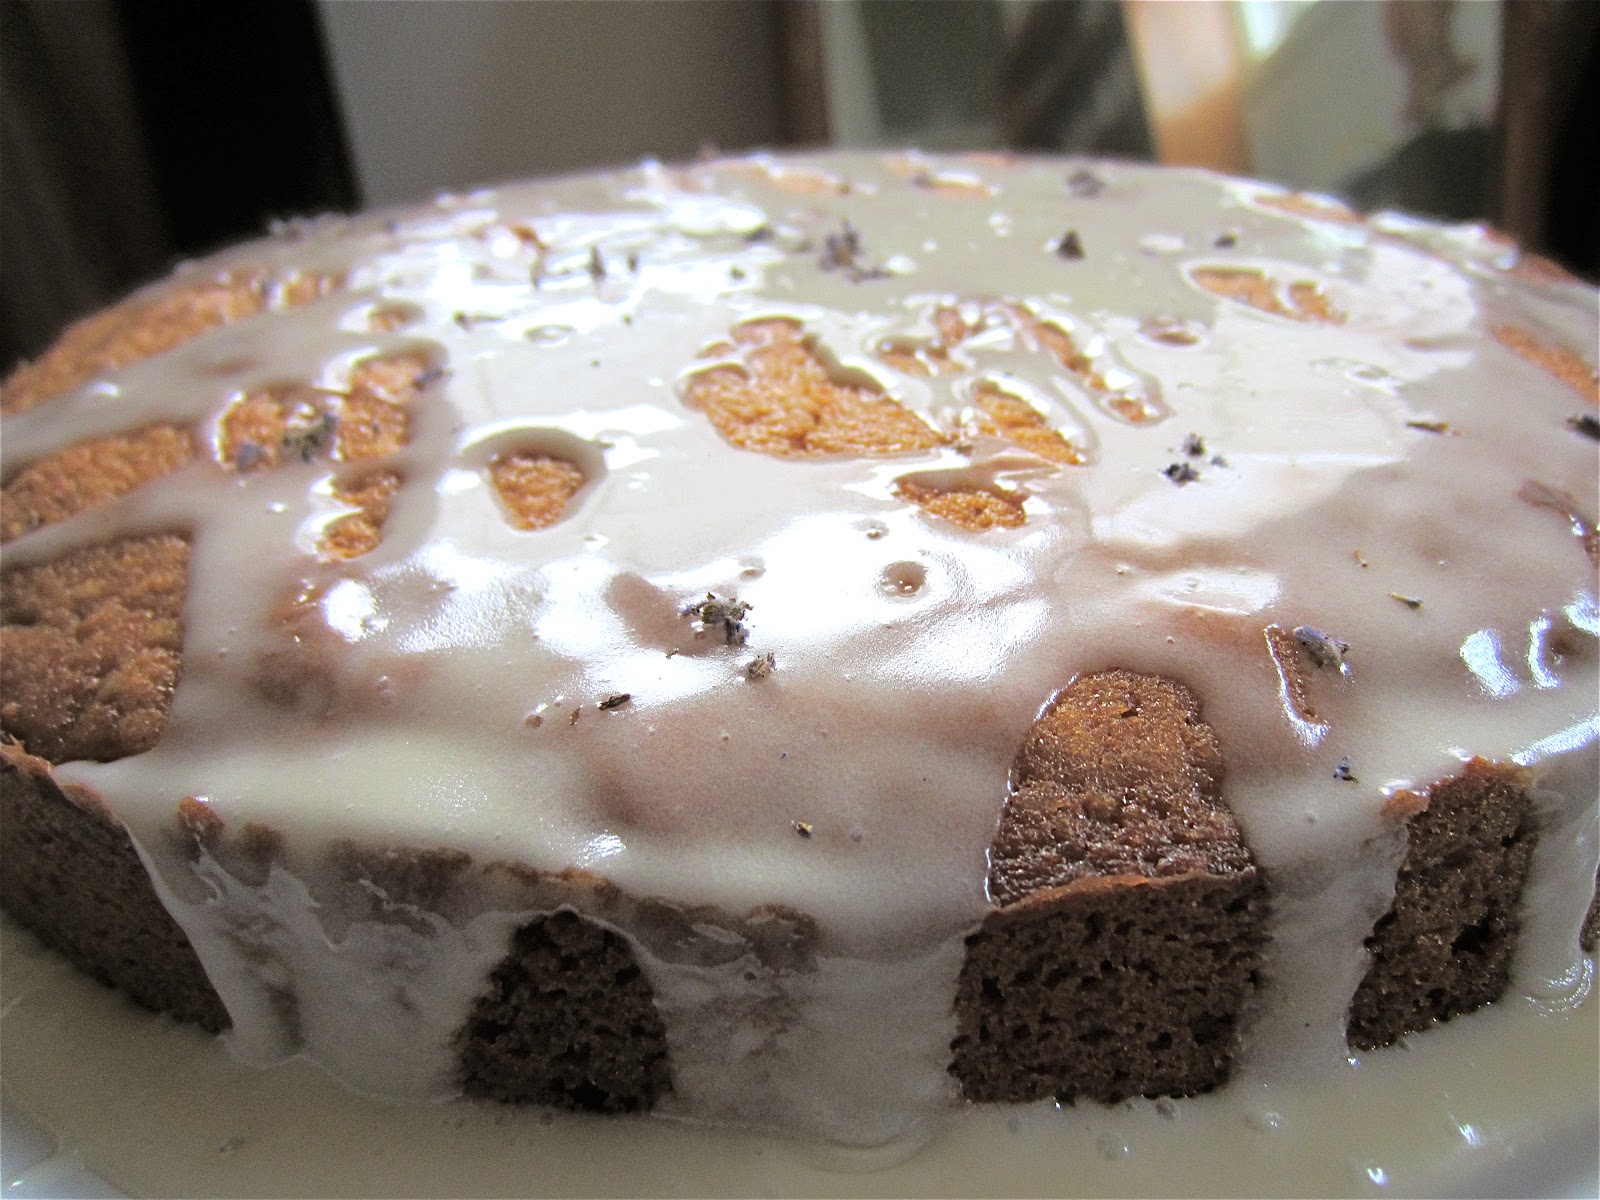
English Lavender Honey Cake


After bringing my lavender plant in for the winter, I harvested some lovely purple pods and dried them out. I had no idea what to do with them, so of course I asked all my super-savvy- facebook friends what to do with it. One of the suggestions I got back was a honey lavender cake. To be honest I had never heard of such a cake so I went to my electronic best friend, Google, and asked her.  (yes, google is officially a her) Turns out there are lots of recipes for honey lavender cake so I picked the one that looked most unhealthy and went shopping for ingredients. 

Just to warn you, this 9-inch cake packs in a lot of butter. It's very delicious and moist, best eaten warm. Don't skip the glaze- it makes this cake.   


Cake Ingredients:
1 cup (2 sticks) unsalted butter
½ cup  sugar
½ cup honey *the recipe originally calls for lavender honey, but who has that???
3 eggs
2 cups  flour
1 tsp baking powder
½ tsp baking soda
½ tsp salt
½ tsp cinnamon
½ tsp chopped dried lavender, plus more for garnish
½ cup sour cream


Glaze Ingredients:
2 teaspoons of honey
¾ cup confectioners sugar
4 tsp. lemon juice *I left this out

Directions:
~Preheat the oven to 325F. Butter  and flour a 9-inch cake tin. (you can use parchment on the bottom if you like)
~Cream the butter (bring to room temp if possible), sugar, and honey together until light and fluffy. ~Beat the eggs lightly together   in a separate bowl and slowly incorporate into the butter base.
~Mix the dry ingredients together (all remaining ingredients but the sour cream) and stir well.
~Fold ⅓ of the flour mixture gently into the butter base, then about ⅓ of the sour cream. Repeat twice more until all ingredients are just incorporated.
~Turn the batter into your prepared cake tin and bake in the oven for about 50 minutes, or until a cake tester comes out clean. 
 ~When you cake is done, remove it from the oven and allow it to cool for about ten minutes, then invert onto a rack to cool.
~When cool, transfer to a plate and make the icing: whisk the lemon juice and honey together, then whisk in the powdered sugar (ideally you’d sift the powdered sugar in to remove any lumps).
~Drizzle over your cake, allowing the icing to trickle down the sides.
~Sprinkle with additional lavender. Allow frosting to set, and serve.


Original recipe from here: the Three Clever Sisters Blog


Thursday, November 29, 2012

Can't-Stop-Eating-Them, Easiest-Ever Homemade Flour Tortillas

We love Mexican food at our house. We love Mexican food out of our house too. (the Chipotle in our area gets a lot of our money) Recently we've been resolving to make our own bread and bread products. No buying sandwich bread, bagels or english muffins or any bread-products at the store (or farmer's market, or anywhere). We've been doing it for a couple months and it's going really well! We haven't even been tempted to buy our usual favorite from the store because homemade tastes so much better! Unfortunately for us, the no-bread-buying rule also applied to tortillas. We never made tortillas before this time and were a little dubious at to how they would turn out. Well, let me tell you- these tortillas are amazingly delicious! You won't want to buy the ones from the store after tasting these. They're extremely simple to make and only use ingredients that 90% of households already have on hand. Ok, enough chit-chat. Here's the recipe: (found on pinterest)

Easy and Utterly Delicious Homemade Flour Tortillas

Ingredients:
3 cups flour
1 tsp. salt*
1/3 cup veg. oil
1 cup warm water

Directions:
Combine all the ingredients until they form a dough. (your kitchen aid mixer isn't needed-just do it in a bowl and 30 sec. later dough has formed) 
Roll the dough into a big ball and pinch off a 1-2 inch piece. 
Roll out the piece on a floured surface. Make it a circle.
Put the raw tortilla into a flat pan on medium high heat and cook until there are little brown speck on both sides (you'll have to flip the tortilla to cook both sides).
Continue pinching off pieces, rolling and cooking until all your dough is used.**

*we thought they could have used a little more salt, but that just depends on your tastes. We'll probably up it to 1 1/2 tsp. next time.
** This recipe made 19 tortillas for us. Some of them were a little bigger than was ideal, you could easily get 24 tortillas out of this batch.


Do enjoy mexican food? Corn or flour tortillas? If you've made your own tortillas before, I'd love to hear about that too!

Happy Tortilla-ing!


Tuesday, April 24, 2012

fav. food blog

guys, i think i found my favorite food blog yet. 

go check it out.

the raspberry buttermilk cake cake is de. licious.


you're welcome.

Monday, April 23, 2012

sandwich love

if you know me super-well, you know that i love a good sandwich. a really good out-of-the-ordinary, yummy ingredients sandwich. 

most of my favorite sandwiches include bacon. um, can't have anything delicious without that. 
i also really like avocado. i once ate guacamole for breakfast. so. good.

anyways, i love a good sandwich for lunch. it's super-fast, filling and yummy.

i'm all about improvising in the kitchen. that's what makes cooking (and ultimately eating) so much fun!

i constantly am trying new combinations. i think i should experiment more with different types of bread. this sandwich was on a slice of homemade white bread. which didn't rise like it should have, so it was more like french-loaf size. 

step one: cut a slice of bread
smear on something delicious: in this case a roasted eggplant and red pepper spread from trader joe's
add some arugula
add some bacon 


step two: add a fried egg
and half a sliced hass avocado
eat with a side of yummy crackers.

oh guys, i could never go on a diet that didn't let me eat bread, pasta, crackers, rice or any grains. i would not. know.what. to. eat.

seriously.


oh, and if you have a Trader Joe's near you, get these crackers. they're like dope.

not that i know what that's like, but Tom Haverford from Parks and Rec is always saying that about awesome, addictive stuff. 

what's in your favorite sandwiches?

Friday, February 10, 2012

chicken enchies (and time saver tips)


i'm always looking for a quick, filling meal.  that means i have to do some things in advance and in big batches to be able to put together a quick meal.

i should let you know i'm not much of a planner. i know there are mothers/wives out there who plan the meals a week at a time. i am not that person. this is how dinner gets decided at our house:


(around 5 or 6 o'clock)
me: are you getting hungry?
k-man: not really, but maybe in like an hour or so.
me: hmmm, ok. are you craving anything in particular?
k-man: no, not really. (rare case scenario ;) )
me: ok. i'll go an see what we have in the fridge. 
k-man: cool. 

and then i concoct something like this recipe. 

ingredient preparation is usually the thing that takes the most time (in many cases) in the kitchen. if you can have many of your ingredients ready to use, then popping something in the oven means you can spend a total of maybe 10 minutes of hands-on time for dinner. the are some things i have found most helpful to do when i have some free time are these:

cooking large batches of chicken breasts in the crock pot
{i buy the frozen bags of chicken breasts at wal-mart and then pop them in the crock pot for 4 hours on high. then i shred them and put them into serving-size containers and freeze them)

shredding cheese
{we never (anymore) buy pre-shredded cheese. in case you haven't noticed, it doesn't really have a cheese flavor. when cheese is on sale (cheddar, mozz, etc...) i buy a bunch and we shred it. it's great for pizzas or  in this case chicken enchies}

boiling eggs
{protein is so important in you diet. i have recently started boiling batches of 5 eggs and storing them in the fridge for quick pick me ups and lunches. sometimes i want something light for lunch but know i will be hungry if i don't have some protein. adding an egg in a flash is just the thing!}

make double pasta
{we eat a lot of pasta and it is very helpful to make twice what you will eat for one meal. for instance, yesterday i made a stir fry. but made extra pasta. it is very helpful to store a container of cooked pasta in the fridge. i can take it out for lunch or dinner the next day and have a meal by just adding pesto or sauce and reheating}


here's a recipe i made using the things we had on hand. these are kind of like enchiladas but with no tomato product since i am allergic to tomatoes (so sad...).

i recommend adding a some salsa to the mix when making this for non-tomato-allergic people. 

here's what you will need: (remember, you just adjust for the number of people you are feeding. this recipe makes 4 enchies. enough for 2 adults)


4 large wheat tortillas
1 1/2 cups shredded chicken
1 cup pink or red beans
1/2 cup sauteed onions and peppers
1 cup shredded cheese
1/2 cup sour cream
1/2 cup chopped cilantro
salsa

directions:
preheat oven to 425F.
mix in a large bowl: chicken, beans, onions, peppers, 1/2 cup cheese, sour cream and cilantro. add 1/2 cup of salsa.

spoon mixture evenly into 4 tortillas and roll. place in a 8x8 pan. top with any leftover mixture. 1/2 cup more salsa and 1/2 cup cheese.

bake at 425F for 20 minutes or until cheese is bubbly.

enjoy!

my mixture sans salsa :/  salsa would have taken it to the next level!! 


ready for the oven! 


hope you make these for  a tasty meal :)

what are some shortcuts you do in the kitchen?

Wednesday, February 1, 2012

italian stir-fry

stir-frys are a common meal at my house. reasons why? oh because:

1. they are very quick to prepare/make
2. they are very filling
3. they are soooooo tasty!
4. they have your starch, veggies, and protein all in one.
5. they only dirty 2 pots.  (and for an entire meal, that's pretty good)

often we have asian stir-frys with soy sauce, sesame oil, bok choy, etc. but we also really like italian stir-frys.

i usually use a different type of pasta (so not linguine or any long type of pasta). i've found rigatoni or ziti works well, but you can use any type you have on hand.

the other great thing about stir-frys is that you can improvise pretty easily. if you don't have a particular vegetable, you can substitute anything you do have on hand.

for this stir-fry you will need:

3/4 pound of pasta, cooked according to box
2 hot italian sausages cut into small pieces
6 cloves of garlic, minced
 1 large handful of straight-leaved spinach, stems removed
1/2 cup chopped pepper (either red bell or green work really well)
1 TBS italian seasoning (or just make your own by combining dried basil, oregano, red pepper flakes (only a couple!), salt and pepper)
chicken broth
parmesan

directions:

while the water for the pasta is coming to a boil, prepare all your ingredients (chopping, mincing etc.)

put your pasta in to the boiling water with 1 TB. of salt.

next get you wok (or extra large frying pan) and heat 1 TB. of oil. as soon as it shimmers add your cut up sausage. once that is mostly cooked through, add the garlic and pepper. mix and cook 3 minutes.

when your pasta is done, add it to the wok and stir to combine. add italian seasoning. stir. add some chicken broth if  the pasta is sticking to the bottom of the pan. 

at last, add the spinach and mix. cover the wok/pan as best you can so the spinach can steam. 
cook approx. 2 minutes or until spinach is wilted.

dish into bowls and top with parmesan.

serves 2 hungry adults ;)

enjoy!

 rigatoni pasta, small sausage pieces, wilted spinach. you can see we mixed 2 different kinds of pasta this time since we had a little in another box to use up.


yum!


Monday, January 30, 2012

apple&cinnamon dessert squares

i rip out pages of books. 

yes, you read that right.

somehow, i end up with countless strips of paper with recipes i've ripped out of magazines, pamphlets, packages, and yes, actually cook books.

all these pieces of assorted recipes get stuffed into my recipe box. and every once in a while, i'll pull one out to try. 

well, lately i've been on a roll. this week i made 4 different recipes i've never tried before. mostly desserts. you should have come to visit. i would have fed you.

this recipe was better than i expected it to be. and a lot easier too.

this recipe originally came from a really old pillsbury mix and match meal book. i changed and added a couple ingredients and it turned out delicious!

i ended up eating a square or two (and sometimes three) for breakfast. it goes really well with coffee.


to make these apple&cinnamon dessert squares you will need:

1 cup all purpose flour
1/2 cup sugar
1 tsp baking power
1/2 tsp. salt
1/4 tsp. nutmeg
2/3 cup milk
1 egg
1 tsp. vanilla
3 large sliced and peeled apples (not granny smiths. i used a mix of gala and macintosh)
1/3 cup sugar
1 tsp. cinnamon

directions:

preheat oven to 350F. Grease your 9x13 pan. 
in a large bowl combine: flour, 1/2 cup sugar, baking powder, salt, nutmeg. mix well.
add milk, egg and vanilla. blend well.
pour into greased pan.
in a small bowl combine: 1/3 cup sugar and cinnamon. mix well.
sprinkle sugar mixture over top.

bake at 350F for 30-40 minutes or until edges are light golden and a fork goes easily through an apple slice.
approximately 12 servings. or 6 if your name is jessica ronnevik.

enjoy!

 cut up your apples into slices that are not too thick.

the batter. 


lay down your apples.


all done and out of the oven!