Wednesday, February 27, 2013

Braised Beef Short Ribs ( a recipe too good not to share)

This year for Valentine's Day something awesome happened- both me and my husband had a totally free day. Since we're musicians, our schedules are a bit unusual and wonked out anyway, but we rarely get a day with literally no scheduled events.  We usually go out to one of our favorite, more fancy restaurants for anniversaries and holidays like Val's day, but since we had the whole day to ourselves, we decided to make something that we probably wouldn't order from a fancy restaurant since it would cost a fortune. So deciding to do the work ourselves, we went grocery shopping and purchased all the ingredients. OK, so enough back story. Here's about the recipe.

The recipe we used is from America's Test Kitchen, which if you don't know what they do or how they come up with their recipes, you need to check them out. End of story, since I could talk all day about how thorough and excellent they are. Continuing on. For this recipe it's of utmost importance that you buy the right kind of meat. You want your short ribs boneless (if you can't find boneless, just de-bone and de-fat them yourself) and at least 4 inches long and about 1 inch thick. This ensures that the meat won't dry out during the long and slow cooking time. You'll start the meat out on the stove top to braise it and then finish it in the oven. You can serve this with egg noodles or boiled potatoes to sop up all the saucy goodness. Apart from the beef bourguignon I had in Paris this past summer, this is the best beef dish I have  ever had. It's succulent and moist with complex flavor. Also, you won't want to eat your carrots any other way once you've had this. If you want to treat your spouse to a special dinner, you've found your recipe!


Braised Beef Short Ribs
Serves 6, or 4 very hungry adults
3 1/2 pounds boneless short ribs with fat trimmed off and cut into 2 inch pieces (we actually used slightly less meat since it's super expensive)
Table salt and pepper
2 TB veg. oil
2 large onions, thinly sliced into strips (about 4 cups)
1 TB tomato paste
6 medium garlic cloves
2 cups red wine, either Cabernet Sauvignon or Cotes du Rhone (we used Cabernet and it was amazing)
1 cup beef broth
4 large carrots, peeled and cut into 2 inch pieces
4 sprigs of FRESH thyme (please don't substitute dried here!)
1 bay leaf
1/4 cup cold water
1/2 tsp. powdered unflavored gelatin

1. Put your oven rack in the lower middle position and preheat to 300F. Dry the beef (pat with paper towels) and season with  salt and pepper on both sides. Heat 1 TB of the oil in a Dutch oven over medium-high heat, until the oil is smoking just a bit. Add half of the beef to the pot and let it brown on both sides, about 3-5 minutes per side. (try not to stir or move it as it is browning- it won't brown as well) Take the beef out and set in a medium bowl. Repeat the process with the rest of the beef. Take out the pieces and set them in a bowl with the first half of browned beef.

2. Reducing the heat to medium, add all the onions and cook until they are soft and just turning brown, about 10 minutes. Add the tomato paste and cook while stirring constantly, until it's a bit brow, about 2 minutes. Add the garlic and cook about 30 seconds. Increase the flame to medium high and add the wine. Simmer it while scraping the sides and bottom of the Dutch oven, to get all the flavor and loosen those yummy browned bits. Simmer until the liquid is halved, about 8 minutes.  Add the broth, carrots, thyme, bay leaf, and beef, including all the juice that's in the bottom of the bowl that you had the beef in. Cover the pot and bring to a simmer. Then transfer the pot to the oven and cook, stirring once about an hour through. Cook in the oven about 2- 2 1/2 hours, or until a fork slips in and out easily of the meat.

3. Put the water in a small bowl and sprinkle gelatin on top; let it sit for 5 minutes. Using tongs transfer the meat and veggies (onions included) onto a serving platter. Drain the liquid through a fat separator and discard the solids. Put the liquid back into the Dutch oven and cook over medium heat for 5 minutes. Remove from heat and stir in the gelatin mixture. Season with salt and pepper. Pour over the meat and veggies. 


So there you have it! I hope you try this recipe. Be warned that it can be a little on the expensive side, about $20 for the meat and $10 for the wine. But if you were to order this in a restaurant it would cost much, much more.




Tuesday, January 29, 2013

since last time...

I don't really have a whole lot to say today except that I wish I was blogging more. A lack of inspiration combined with being really busy ( the #1 blogger excuse, courtesy of lazy.com/blogger)  has accounted for my invisibleness on this blog. However, I am super excited to start a new series called "Make Your Own:______." Obviously the blank will be filled in with exciting things, mostly food.

Over Christmas and New Year's I was sick for a couple weeks which allowed me to read a lot. I read the book "Animal, Vegetable, Miracle" by Barbara Kingslover. If you haven't read it, I highly recommend it. It's fast, interesting, and very yummy (as much as a book can be). Besides being all of that, it inspired me to start making some of the things that we buy at the store without thinking if we could make them or not. So here's to a delicious (hopefully) expedition of making and not buying bread, butter, cheese, yogurt, jams, and whatever else I can without going broke or ruining my taste buds.

And just because no blog post should be without a picture, here's some of what we've been eating and making since my last post.


taco night. yuuuuhm! steak and chicken, cilantro-lime rice, sauteed red onions and peppers, guacamole, salsa, sour cream, and siracha (for an extra kick of heat)  


Black Pepper and Nutmeg Popovers from Bon Appetit's November Magazine.


This is such a yummy, fast lunch. Homemade bun sliced in 1/2 with a fried egg and topped with Trader Joe's chicken andouille sausage. Their sausages, while expensive, are some of my favorites ever. They don't have any nitrates, are already precooked and have such a delicious flavor. I highly recommend them!

What yummy food have you cooked recently?

Wednesday, December 19, 2012

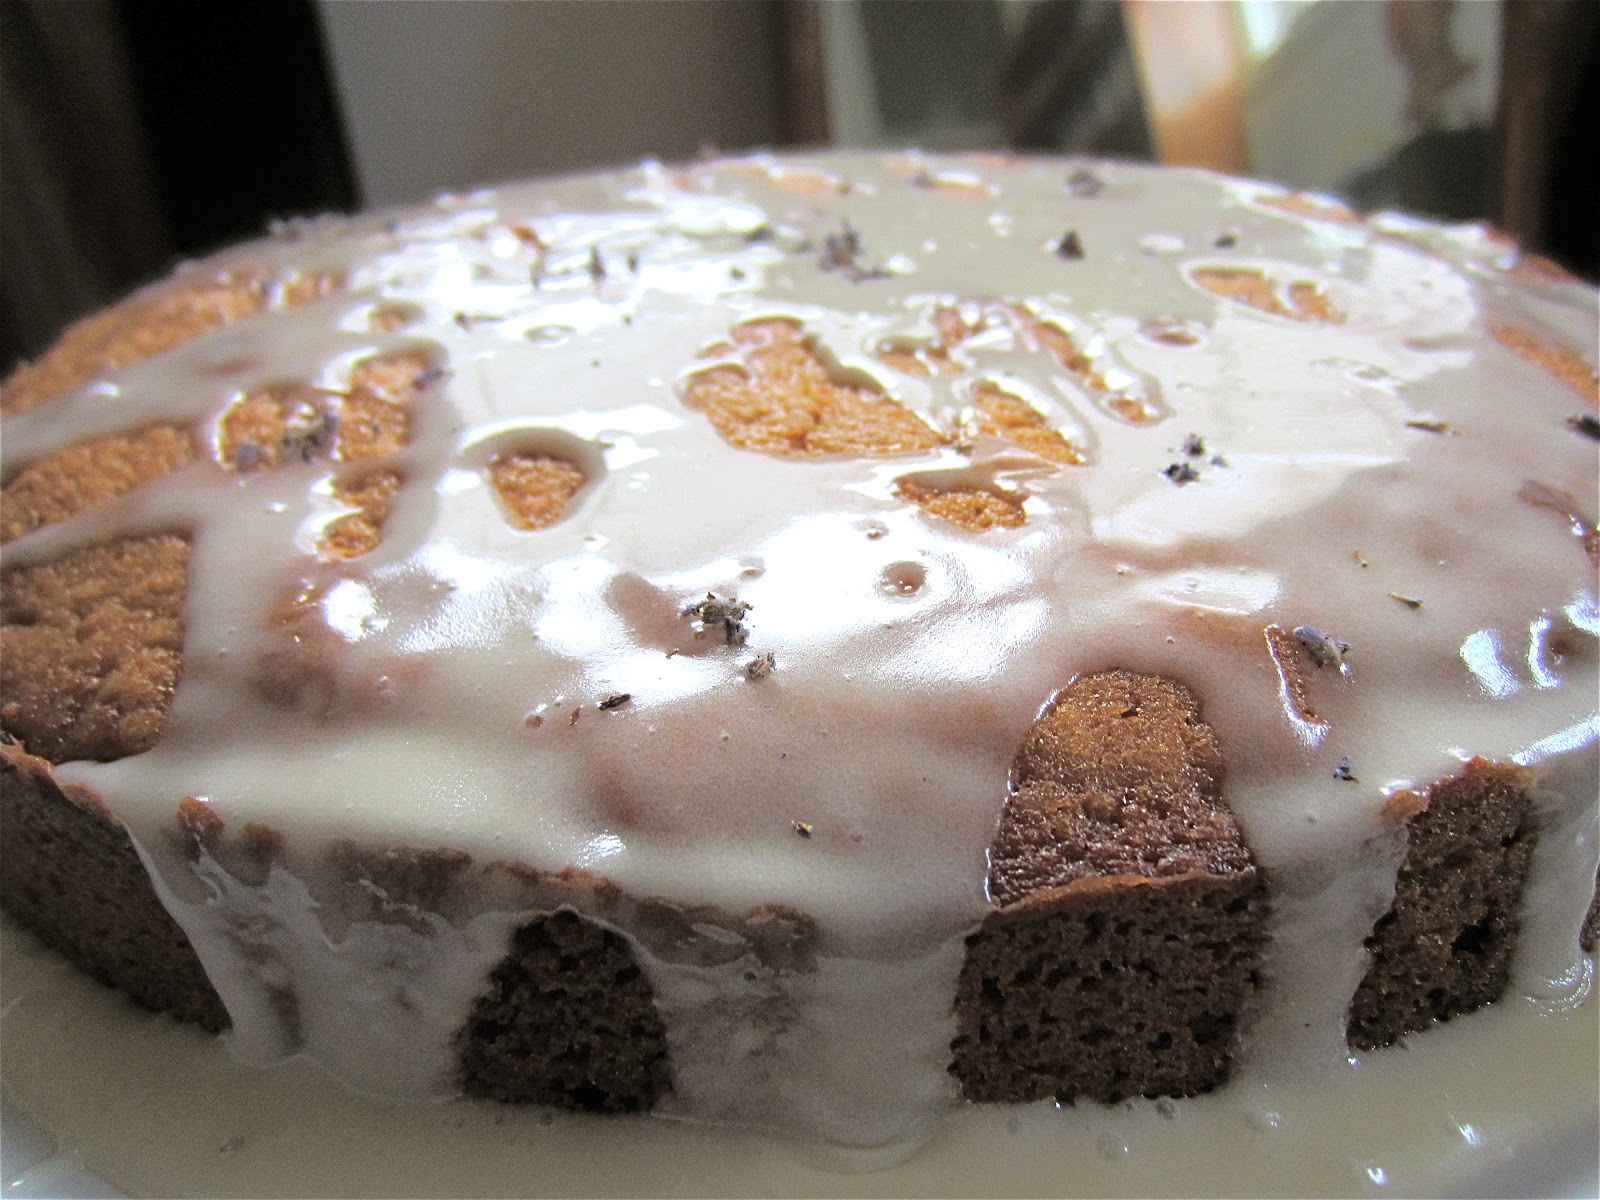
English Lavender Honey Cake


After bringing my lavender plant in for the winter, I harvested some lovely purple pods and dried them out. I had no idea what to do with them, so of course I asked all my super-savvy- facebook friends what to do with it. One of the suggestions I got back was a honey lavender cake. To be honest I had never heard of such a cake so I went to my electronic best friend, Google, and asked her.  (yes, google is officially a her) Turns out there are lots of recipes for honey lavender cake so I picked the one that looked most unhealthy and went shopping for ingredients. 

Just to warn you, this 9-inch cake packs in a lot of butter. It's very delicious and moist, best eaten warm. Don't skip the glaze- it makes this cake.   


Cake Ingredients:
1 cup (2 sticks) unsalted butter
½ cup  sugar
½ cup honey *the recipe originally calls for lavender honey, but who has that???
3 eggs
2 cups  flour
1 tsp baking powder
½ tsp baking soda
½ tsp salt
½ tsp cinnamon
½ tsp chopped dried lavender, plus more for garnish
½ cup sour cream


Glaze Ingredients:
2 teaspoons of honey
¾ cup confectioners sugar
4 tsp. lemon juice *I left this out

Directions:
~Preheat the oven to 325F. Butter  and flour a 9-inch cake tin. (you can use parchment on the bottom if you like)
~Cream the butter (bring to room temp if possible), sugar, and honey together until light and fluffy. ~Beat the eggs lightly together   in a separate bowl and slowly incorporate into the butter base.
~Mix the dry ingredients together (all remaining ingredients but the sour cream) and stir well.
~Fold ⅓ of the flour mixture gently into the butter base, then about ⅓ of the sour cream. Repeat twice more until all ingredients are just incorporated.
~Turn the batter into your prepared cake tin and bake in the oven for about 50 minutes, or until a cake tester comes out clean. 
 ~When you cake is done, remove it from the oven and allow it to cool for about ten minutes, then invert onto a rack to cool.
~When cool, transfer to a plate and make the icing: whisk the lemon juice and honey together, then whisk in the powdered sugar (ideally you’d sift the powdered sugar in to remove any lumps).
~Drizzle over your cake, allowing the icing to trickle down the sides.
~Sprinkle with additional lavender. Allow frosting to set, and serve.


Original recipe from here: the Three Clever Sisters Blog


Happy Christmas


I've always been partial to the british version "happy Christmas." It's not that I don't like the word "merry," but ever since I heard Kate Winslet say "happy christmas" in the movie The Holiday it just stuck. So happy Christmas to all of you as we celebrate the season of Christ's birth!


This is the picture we used for our christmas card this year. We look like nice people. 


But if you know us well, this is who we really are ;)


Happy Christmas everyone!

Thursday, November 29, 2012

Can't-Stop-Eating-Them, Easiest-Ever Homemade Flour Tortillas

We love Mexican food at our house. We love Mexican food out of our house too. (the Chipotle in our area gets a lot of our money) Recently we've been resolving to make our own bread and bread products. No buying sandwich bread, bagels or english muffins or any bread-products at the store (or farmer's market, or anywhere). We've been doing it for a couple months and it's going really well! We haven't even been tempted to buy our usual favorite from the store because homemade tastes so much better! Unfortunately for us, the no-bread-buying rule also applied to tortillas. We never made tortillas before this time and were a little dubious at to how they would turn out. Well, let me tell you- these tortillas are amazingly delicious! You won't want to buy the ones from the store after tasting these. They're extremely simple to make and only use ingredients that 90% of households already have on hand. Ok, enough chit-chat. Here's the recipe: (found on pinterest)

Easy and Utterly Delicious Homemade Flour Tortillas

Ingredients:
3 cups flour
1 tsp. salt*
1/3 cup veg. oil
1 cup warm water

Directions:
Combine all the ingredients until they form a dough. (your kitchen aid mixer isn't needed-just do it in a bowl and 30 sec. later dough has formed) 
Roll the dough into a big ball and pinch off a 1-2 inch piece. 
Roll out the piece on a floured surface. Make it a circle.
Put the raw tortilla into a flat pan on medium high heat and cook until there are little brown speck on both sides (you'll have to flip the tortilla to cook both sides).
Continue pinching off pieces, rolling and cooking until all your dough is used.**

*we thought they could have used a little more salt, but that just depends on your tastes. We'll probably up it to 1 1/2 tsp. next time.
** This recipe made 19 tortillas for us. Some of them were a little bigger than was ideal, you could easily get 24 tortillas out of this batch.


Do enjoy mexican food? Corn or flour tortillas? If you've made your own tortillas before, I'd love to hear about that too!

Happy Tortilla-ing!


Wednesday, November 14, 2012

Gettin' My Groove On With Frimoo Glasses-A Sponsored Post


Usually when I get emails from companies to blog about their products I just delete them. First of all, I usually assume that they're spam, and secondly, I think "how in the world do they know I have a blog???" Freaky. 
However, when I got an email from Firmoo.com, I thought what if it IS real? What if I really CAN get a free pair of glasses for my aging eyes? (bad eyesight runs deep in my family) I was desperately in need of a new pair of glasses. I had ordered a super cheap pair from another online company and they were literally falling apart.I went to Firmoo's website and was pretty surprised with what they had to offer. Stylish frames. Good quality. Good customer service. and um, FREE.
After a bit of browsing I choose my frames (they're selling for around $36), entered my vision and PD info onto their easy order form, and about 10 days later got them in the mail!
I was surprised with their quality and how sturdy they are. My glasses came in a hard leather-ish case with a cloth and also a glasses screwdriver-keychain and extra arm joint screws. 

Take a look at my new specs:

sweater: Eddie Bower via savers, dress: savers, leather belt: savers, riding boots: marshalls, earrings: charming charlie, necklace: vintage, glasses: firmoo.com

So guess what? You can get a free pair too! That's part of the perks to blogging about this sweet deal I got. Click the link to get yourself some awesome specs: Free Glasses

I love that geek glasses are totally in. Who wears them best? Um, Zooey Deschanel, obviously. Someone please tell me that I'm not the only New Girl fan out there.


Thursday, November 8, 2012

Our Last Leg: Vernazza, Switzerland, Paris and Madrid


Looking back over all the amazing times we had during our European adventure makes it really hard to pick just a couple photos for you. However, I'm FORCING myself to finally complete my blog series on our trip to europe this past summer in one short post. (believe me, I could go on for years sharing picts with you guys. however, there are other things that are also important to blog about like pumpkin recipes and such)
So without further ado, here goes:

 If you remember from the last post, we had been in Rome and Florence where the temps were just amazingly hot. We were so relieved to get to the Cinque Terre (5 little towns on the seacoast all connected by hiking trails). We spent a couple days cooling off in Vernazza, this charming tiny coastal town. It was one of our favorite stops on our entire trip. (and the tan I got there is just starting to wear off my legs 3 months later!)


 After Vernazza, we went to Basel, Switzerland and spent some time with our friend (and also violinist in our quartet). It was super fun to go wandering around this city! I could picture myself living here. On hot days, people get floaties and just float down the Rhine (pictured above) riding with the current. We spotted about 30 people while we were there-it's quite funny.

We went grocery shopping in Basel- cooking for ourselves and our host. I almost laughed when I saw this bottle labeled "American Sauce." I wonder what in the world that tastes like.


After Switzerland, we went to Paris and believe me, as a book lover, it took a LOT of control not to go crazy buying all these old books. There were tons of carts along the bridges selling books, art, vintage art and everything in between. I came home with 1 print. The art is so cheap too!


 Rome has beautiful fountains, but no one can deny that Paris has her fair share as well.

 Le Tour Eiffel at dusk. Rooooomantic. 


Paris Opera House. Really magnificent inside. 

Square where Victor Hugo's apartment is. If you ever visit here, go to the museum/house- it's free!


Do NOT Skip going to the Shakespeare and Company bookstore if you are in Paris! It's extremely quaint and amazing. You aren't allowed to take pictures inside but it's filled with old and new books and a rickety old staircase to upstairs where there's nooks with old couches and victorian sofas in the middle of book piles, and a piano.  

Our time in Madrid was short, but it was an amazingly beautiful city by night. We stayed with some wonderful couchsurfing hosts and had a late dinner (we started eating at 11. we were told this is pretty traditional for the summer time.)


So there you have it! Just a few little tidbits of our last leg. Perhaps someday we'll go back. I already can't wait!